
Here's something I see constantly in Kubernetes clusters: pods with no resource specifications at all, or with numbers someone typed based on gut feeling rather than actual measurement. And then people wonder why they get OOMKilled pods, or why the cluster is slow, or why their cloud bill is higher than expected.
Resource configuration is one of those things that feels like a detail but affects almost everything — scheduling decisions, cost, reliability, how your cluster behaves under load. Let me explain how it actually works.
Requests vs Limits: Two Very Different Things
People often treat these as a range — "the pod will use between this much and that much." That's not what they are.
Requests are a scheduling guarantee. When you set a CPU request of 250m, you're telling the scheduler "don't put this pod on a node unless it has at least 250m of unallocated CPU." The scheduler uses requests to make placement decisions — not actual usage.
Limits are enforcement. CPU limits throttle — if your container tries to use more than its limit, it gets slowed down. Memory limits kill — if your container goes over, it's OOMKilled immediately. No warning, no graceful shutdown.
resources:
  requests:
    cpu: "250m"      # The scheduler guarantees this
    memory: "256Mi"
  limits:
    cpu: "500m"      # Can burst to this, then throttled
    memory: "512Mi"  # Goes over this, gets killed
CPU and Memory Are Not the Same
This matters more than most people realise. CPU is what engineers call "compressible" — if your container wants more CPU than its limit, it gets throttled and slows down. The process keeps running. You might see higher latency, but no crashes.
Memory is not compressible. There's no such thing as "slower memory usage." If you exceed the limit, the container gets killed. This is why setting memory limits too low is much more dangerous than setting CPU limits too low.

Quality of Service: Who Gets Killed First
When a node runs low on resources, Kubernetes has to evict some pods. This is directly tied to the pod lifecycle — specifically the termination sequence covered in Kubernetes Pod Lifecycle. The order depends on the QoS class, which is determined by how you've configured requests and limits.
Guaranteed — requests equal limits for both CPU and memory. Kubernetes evicts these last. Use this for anything you really don't want restarted during node pressure.
resources:
  requests:
    cpu: "500m"
    memory: "512Mi"
  limits:
    cpu: "500m"      # Same as request = Guaranteed
    memory: "512Mi"
Burstable — requests are set but different from limits. Evicted before Guaranteed. Fine for most workloads.
BestEffort — no requests or limits at all. First to be evicted. Never use this in production — your pod will be the first to go whenever any node is under pressure.
Setting Defaults with LimitRange
The problem with relying on individual developers to always set resource specs: they won't. A LimitRange sets sensible defaults for an entire namespace, so any pod that doesn't specify resources gets reasonable values automatically:
apiVersion: v1
kind: LimitRange
metadata:
  name: default-limits
  namespace: production
spec:
  limits:
  - type: Container
    default:
      cpu: "500m"
      memory: "256Mi"
    defaultRequest:
      cpu: "100m"
      memory: "128Mi"
How to Find the Right Numbers
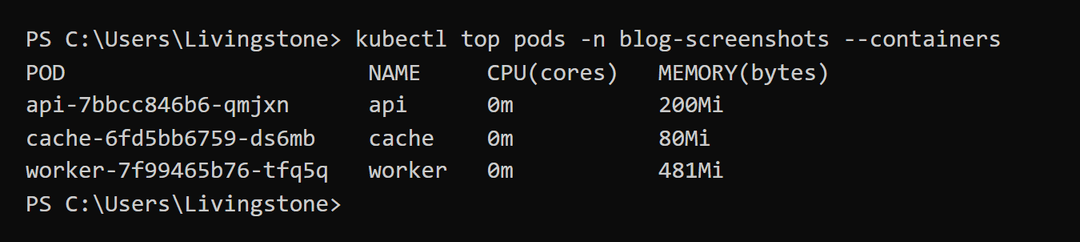
The honest answer: you can't set accurate resource specs without measuring. Check actual usage first:
kubectl top pods -n production
kubectl top pods -n production --containers
Set your requests around the 90th percentile of actual usage — not the average. Set limits at about 2x the request to allow for normal variation without getting killed.
For a more systematic approach, deploy VPA in recommendation mode. It watches your pods over time and tells you what the numbers should be, based on evidence:
apiVersion: autoscaling.k8s.io/v1
kind: VerticalPodAutoscaler
metadata:
  name: my-app-vpa
  namespace: production
spec:
  targetRef:
    apiVersion: "apps/v1"
    kind: Deployment
    name: my-app
  updatePolicy:
    updateMode: "Off"   # Just show recommendations, don't change anything
kubectl describe vpa my-app-vpa -n production
# Shows: Lower Bound, Target, Upper Bound for CPU and memoryTake the Target value as your request, and double it for the limit. Then watch for OOMKills and throttling over the next week. Adjust from there. It takes a bit of iteration, but it's much better than guessing.
Comments
All comments are reviewed before appearing.
Leave a Comment